Alaska Good Life
  • The Good
  • The Food
    • The Brew
  • About

Bibimbap (?)

11/3/2019

2 Comments

 
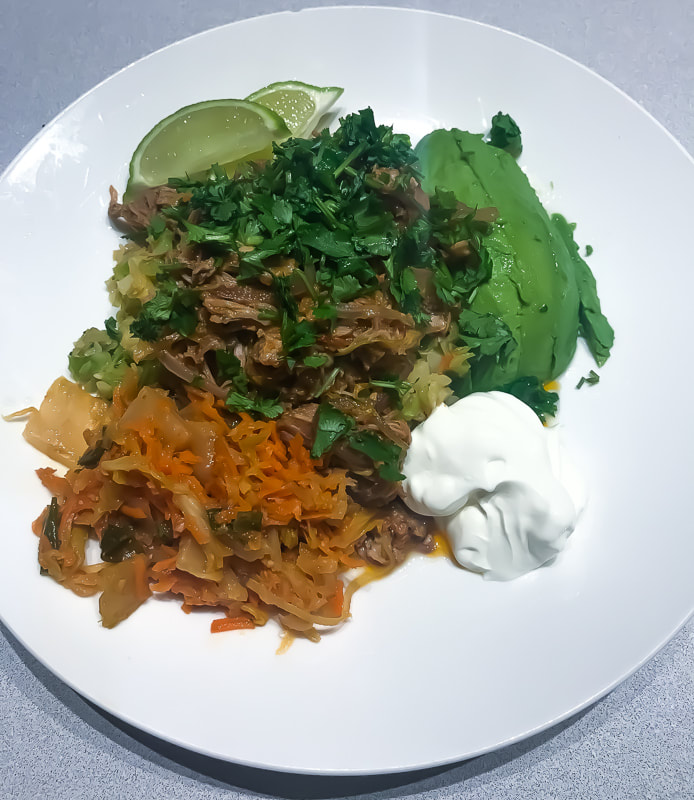
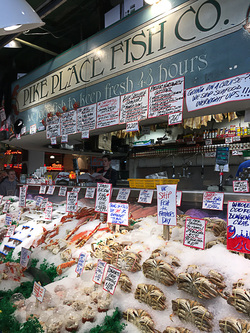
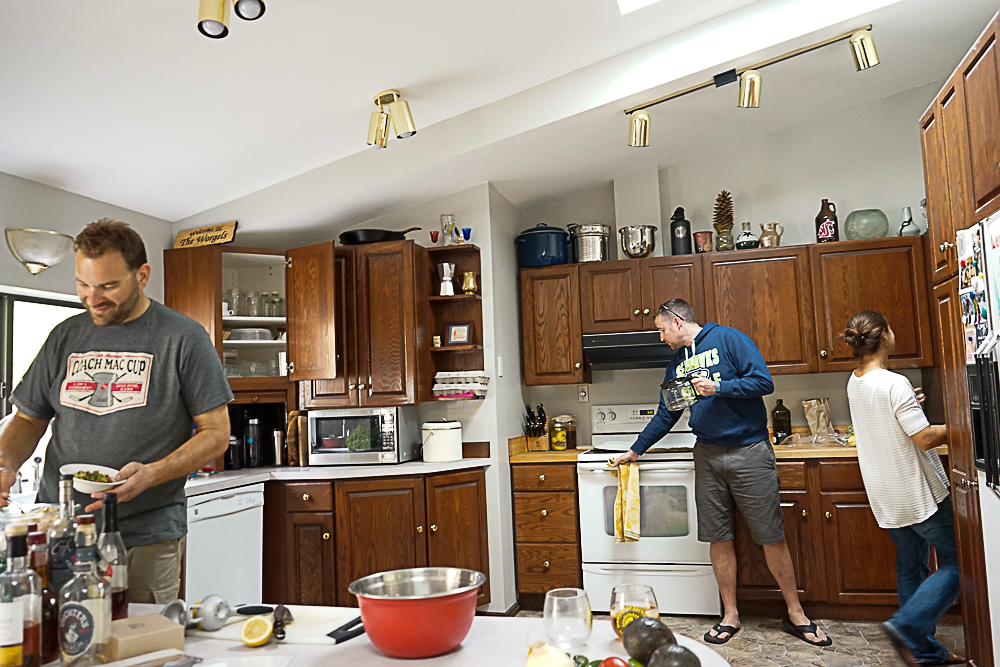
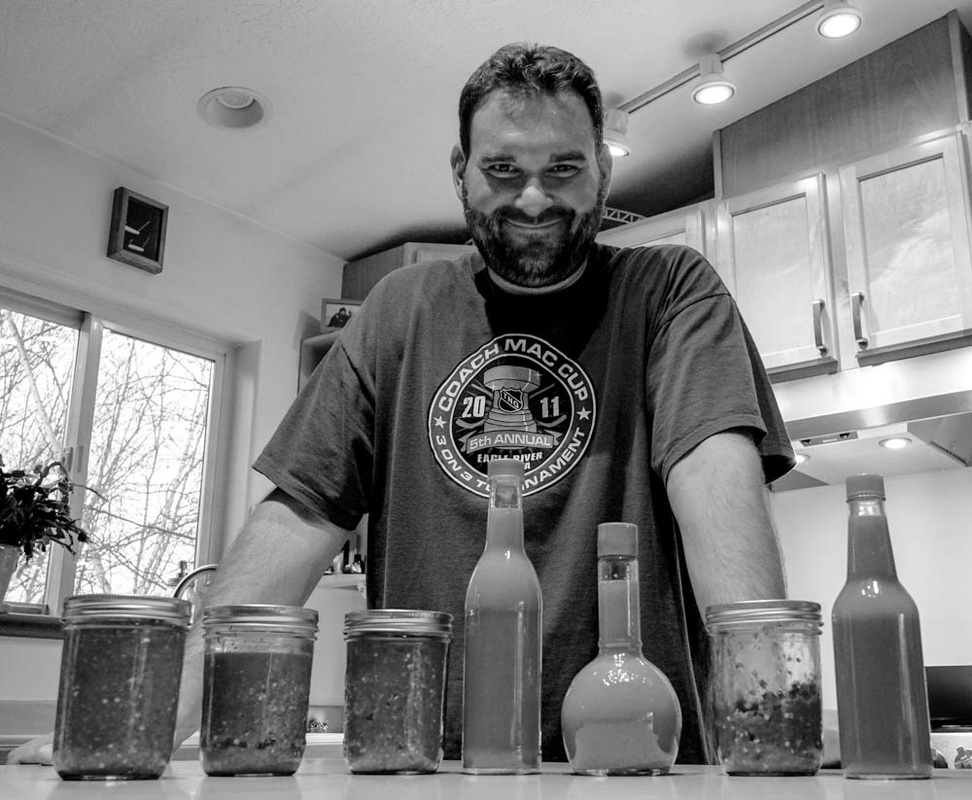
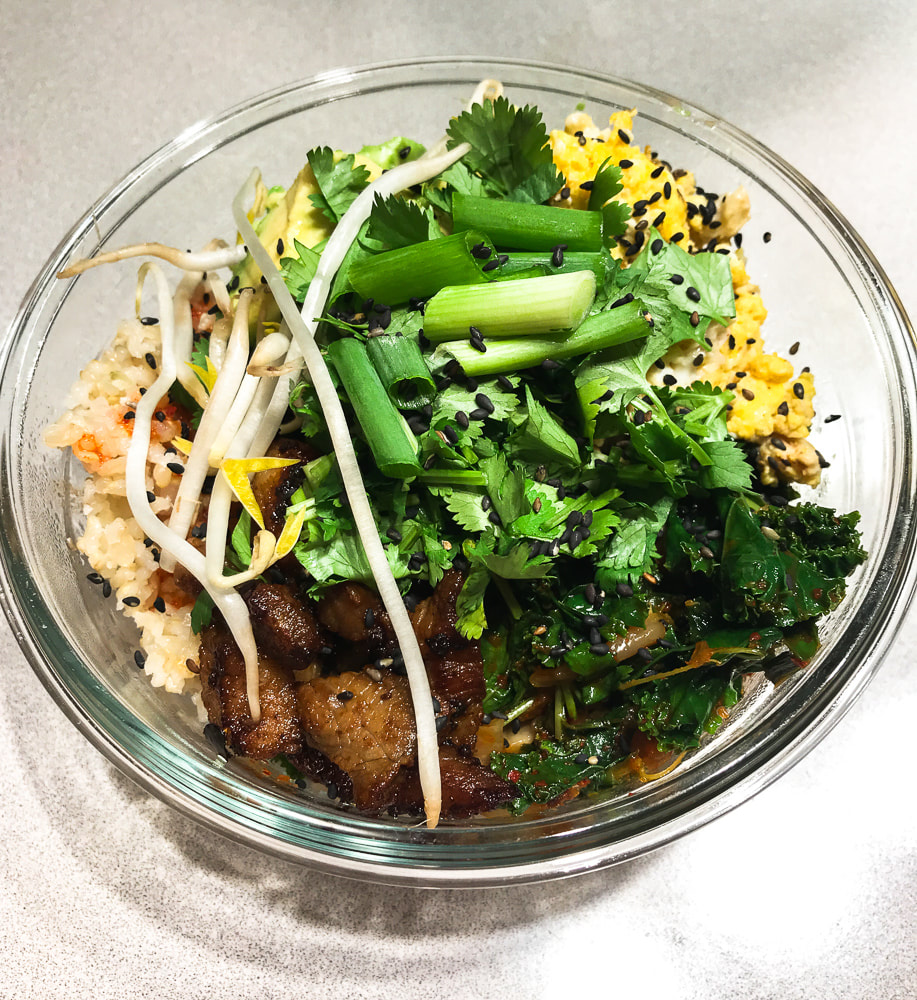
This Korean classic is showing up everywhere in my life recently. We stumbled upon a magic bowl at Matt's in the Market in Seattle and something called a Seoul Bowl is on the menu at Snow City Cafe at the moment.  This weekend, Adam made this for us and the result is something I could eat for breakfast, lunch, or dinner: anywhere, anytime. Is it fair to call it Bibimbap? It gets at the essential ingredients with a few twists. Whatever we call it, it is my favorite thing to eat right now. 
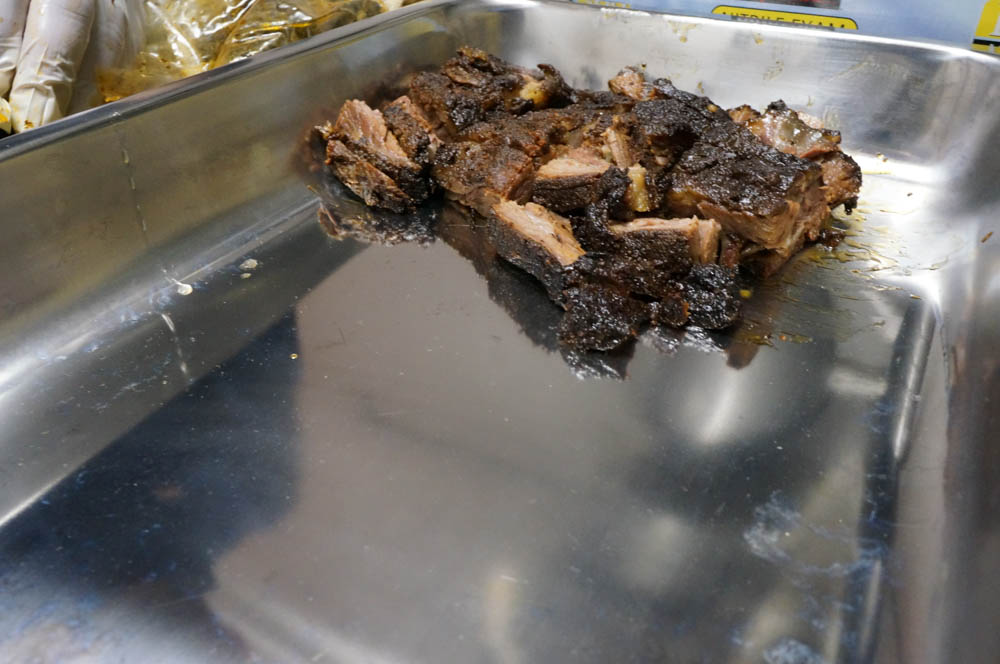
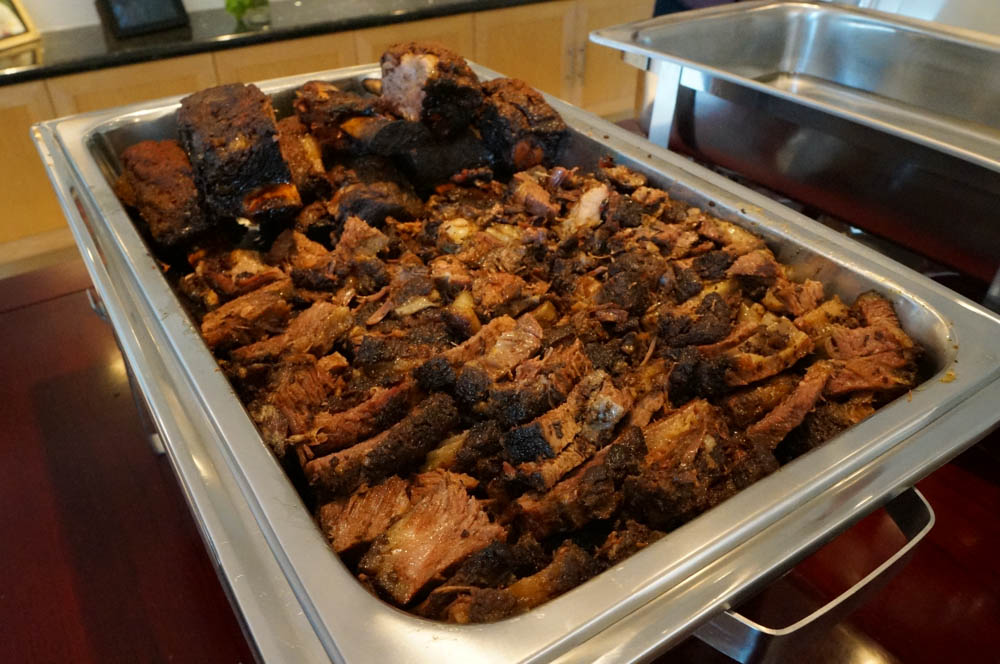
Ingredients


Kale
Eggs
Green onions
Avocado
Pork Belly
Kimchi, juice reserved
Cilantro
Avocado oil
Roasted black sesame seeds
Bean sprouts
Brown Rice 
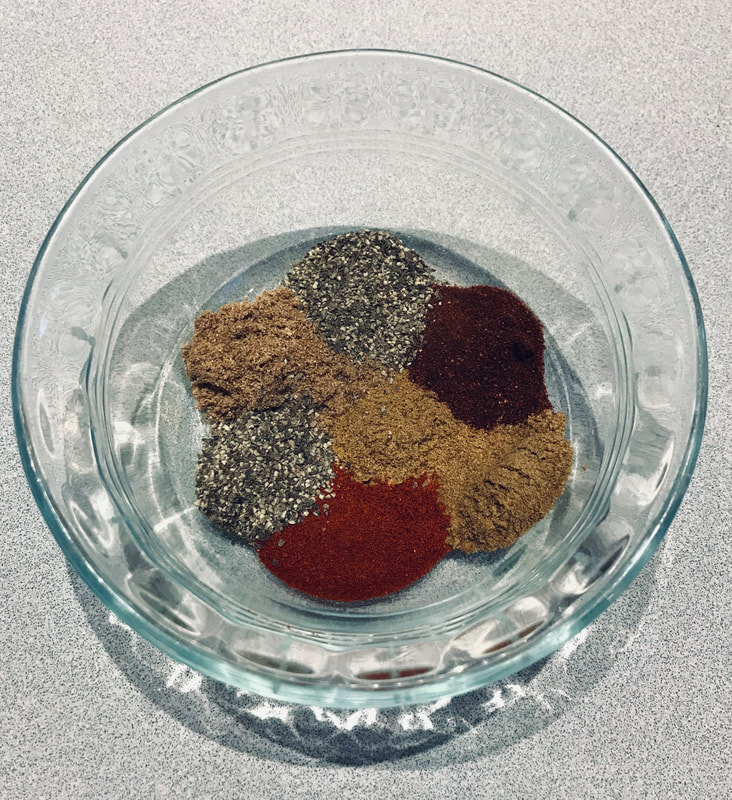
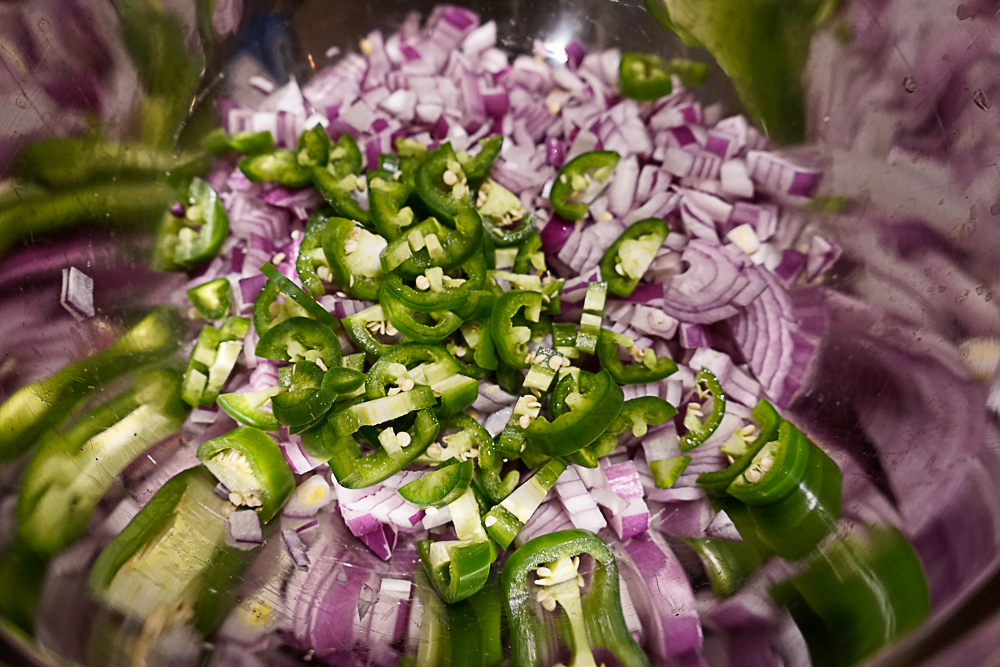
Picture

Instructions

  1. Cut pork belly into bites and marinate in the kimchi juice for an hour.
  2. In a hot cast iron, fry cooked rice in avocado oil.
  3. Next, cook pork belly in batches until crispy.
  4. Sauté kale with green onions and kimchi in batches. Transfer cooked kale to a bowl with tongs so the pork belly fat stays in the skillet. Add avocado oil as necessary between batches.
  5. Add fresh cilantro, black sesame seeds, and green onions to the kale/kimchi mixture. 
  6. Scramble a few eggs in the remaining fat. 
  7. Set out the ingredients, including unused kimchi juice and serve buffet style. 
2 Comments

Coconut Cream of Mushroom Soup

9/8/2019

1 Comment


Ingredients

1 onion, minced
3 packages mushrooms, sliced
7 cloves of garlic, minced
1/2 tsp thyme
Salt and pepper
3 cans of coconut milk
2 cups chicken broth
1/2 tsp cayenne
​1 cup sour cream
Lemon juice to finish
Sour cream and fried mushrooms for garnish

Instructions

  1. Saute the onion until translucent
  2. Add mushrooms, salt, pepper, and thyme
  3. Cook down until liquid concentrates
  4. Add garlic and cook for 30 seconds
  5. Add coconut milk and broth and bring to a simmer for 20 minutes. 
  6. Immersion blend the soup until the mushrooms are finely minced. 
  7. Remove the pot from heat and blend in 1 cup of sour cream with the immersion blender.


It is a happy day to get in a motorcycle ride, smell the fresh scents of fall, and make a nourishing meal. 
1 Comment

Kimchi Pulled Pork Bowl

1/27/2019

1 Comment

 
Adam and I came up with this on the fly yesterday. This recipe took very little effort, made the house smell amazing, and will provide leftovers for salads and soups.

Ingredients

5 lbs Pork Butt cut into 2 inch chunks
4 cups Kimchi (or 2 jars store bought)
Cauliflower rice
2 large onions
2 tbls ​Avocado oil
Limes 
Avocado
Cilantro (don't toss the stems)
Sour Cream
​Kimchi


Picture
I painted this watercolor in Summer 2018. It depicts some of the ingredients that are almost certainly in our kitchen on any given day.

Instructions

Picture
Cook
  1. Heat the oven to 325 degrees and place rack in lower middle. 
  2. Mix pork, kimchi, and cilantro stems in a large dutch oven and bring to a simmer on the stove. 
  3. Move the pot to the oven for about 3 hours. Stir in the middle. 

Serve
  1. ​Draw a few tablespoons of fat from the cooked pork to saute the cauliflower rice. Season with salt and pepper. 
  2. In a separate pan, cook 2 large onions in a bit of avocado oil until browned for about 10 minutes. Then add the sweet onions to the pork. 
  3. Serve the pulled pork over cauliflower rice, avocado, chopped cilantro, sour cream, and fresh kimchi. 
1 Comment

Adobo Chili

10/13/2018

0 Comments

 
Here we are, the wind has lifted the leaves from the trees, and we can see our neighbors again through the fence of sticks and twigs. The chill in the air calls for soup, comfort food, spices, and pots simmering on the stove. 
Picture
Picture

Ingredients

Picture
1 pound pork belly
1 pound tough, fatty meat (leg of lamb, brisket, or flank steak)
2 red onions, chopped
4 cloves garlic, crushed
3 jalapeños, halved and then sliced - keep the seeds in if you wish (we do)
1/2 pound mushrooms, sliced
1 tsp cumin
1 tsp coriander
1/2 tsp smoked paprika
1/2 tsp chipotle powder
1 tsp black pepper
3 limes, juiced
28 oz can fire roasted tomatoes and juice - Chop the whole tomatoes if necessary.
Adobo sauce from one can of chipotle chiles, 4 or so chipotles, chopped
2 cups chicken broth
Liquid Smoke - Use this at the end if desired. Just a few drops will do. Sometimes we omit this if the we're adding things like lamb bacon or something that is already bring a lot of smoke to the party. 

Picture
Picture
Picture
Picture

​Instructions

  1. Salt and brown meat in batches. Set aside. 
  2. ​Saute the onions, jalapenos, and chipotle chiles.
  3. Then, add the garlic and let cook for 30 seconds.
  4. Then, add the spices and stir for 30 seconds.
  5. Next, throw in the tomatoes, adobo sauce, and lime juice. Cook for 5 minutes.
  6. Add the meat back into the pot, and mix well.
  7. Add chicken broth, and cook until the meat is tender, about 20 minutes or so. 
  8. Turn off heat, toss in cilantro, and serve with lime wedges, sour cream, and cheddar. 
Picture
Picture
When I think of chili, this is the only thing that comes to mind. The meat we use always varies depending on what is in the freezer at the time. We try to use high-fat cuts that add that extra yummy-factor that only fat can. 
0 Comments

Ground Game

10/15/2017

1 Comment

 
I feel profound gratitude when we get to eat food that has been harvested from our place in the world. It feels like the right way to be, connected to the process of life, death, and life. Last fall, my uncle and cousin took a moose from the wetlands behind our cabins. The fruits of their labor has nourished us, and one of our favorite things to do is to mix it with Alaskan grown fat back. It transforms ever-lean game into some lip-smacking goodness. We've had the good fortune of receiving deer and moose from friends and family. We're immeasurably grateful to those generous hunters. 
Picture
Picture
Picture
Picture
Picture

Ground Game

Ingredients
10 lbs Deer/Moose and back fat -  70% meat to 30% fat
1/2 cup red wine vinegar 
1 cup water

Instructions
  1. Cube fat and meat into 1 inch pieces.
  2. Work quickly to grind the meat before it warms. 
  3. To the ground meat, add vinegar/water mixture and squeeze through your fingers until combined.
  4. Then, mix with a paddle for 90 seconds on low speed until it becomes well-binded. Place in the fridge until ready to vacuum seal.
Picture
Picture
Picture
Picture
This season is intoxicating with its urgent colors, especially in Alaska where fall lasts only a few weeks. Because of its brief but brilliant influence, I fully surrender to the mood of it all. Our food becomes heavier to match the landscape, even the colors of fresh cut flowers in my vase echo the season. 

Mushroom Cream Sauce and ​Moose over Spaghetti Squash

Ingredients
Half a red onion, minced
1 1/2 lb ground game meat
1 lb cremini and button mushrooms, sliced
1 cup heavy whipping cream
Salt and pepper

Instructions
  1. Brown the ground meat in avocado oil. 
  2. In a separate sauce pan, Sautee onion in butter
  3. Add garlic and mushrooms. Cook down until they are reduced and the liquid has evaporated. 
  4. Remove from heat and add heavy cream. Return to a simmer for a few minutes until it thickens. 
  5. Salt and pepper to taste. 
  6. Mix mushroom sauce with the game and serve over spaghetti squash. Top with roasted squash seeds that are seasoned with salt, cumin, and porcini mushroom powder.
Picture
1 Comment

Breakfast Egg Casserole

7/23/2017

0 Comments

 
As so many recipes do, this one came to our kitchen from Adam's mom, which came from her friend, Penelope, which may have come from...?

​I've been making this recipe for field trips, classes that I teach, and Adam and I for a couple of years. By now, I'm not sure how similar it looks to the recipe origin. What makes this so great is that you too can make it your own. 

In this recipe we are using our own pork sausage with a seasoning we adapted from Charcuterie.
Picture
Spicy Italian Seasoning 
​

2 tbls fennel seeds (toasted)
1 tbls coriander seeds (toasted)
2 tbls salt
3 tbls smoked paprika
1/2 tsp ground Mexican oregano
2 tbls red pepper flakes
2 tsp coarsely ground black pepper
  1. Toast and then grind fennel and coriander. I like to do this first because it makes the kitchen smell so wonderful. 
  2. Mix in the rest of the spices. This is enough to season five pounds of pork sausage. Add 2 tbls to one pound of pork sausage. 
Egg Casserole
​

1 lb Sausage
8 oz sliced mushrooms
18 oz frozen chopped spinach
8 oz sharp cheddar, shredded
3.8 oz can sliced olives
​1 or 2 bell peppers, chopped
Halved cherry tomatoes
Scallions, sliced
1/2 tsp salt
10 eggs
Splash of cream
​Sour cream for dolloping

Instructions
  1. Cook the sausage, then add mushrooms. 
  2. Heat oven to 375 degrees.
  3. Defrost spinach in microwave and drain.
  4. Whisk eggs, salt, and cream together. 
  5. Assemble:
    1. Spinach on bottom
    2. Sausage and mushrooms
    3. Cheese, green onion, bell peppers, olives, tomatoes
    4. Pour in eggs and push ingredients down to help egg distribution. It will look like there is not enough eggs, but there is. 
  6. Cook for one hour. 
  7. Dollop with sour cream and sliced scallions. 
Picture
0 Comments

Turkey Puffs for Thanksgiving

11/26/2016

0 Comments

 
Thanksgiving has always been a major holiday for my family. I have the best memories of cooking for two or three days before Thursday, planning weeks ahead for half a dozen or so recipes.  We had an A-Frame house that had stairs in the middle, so each year Dad put a huge piece of plywood on top of the cedar-sided railing, and our upstairs was transformed into a buffet. The plywood was dressed with a tablecloth, plates, napkins, punch, several kinds of cookies, bread sticks, cheese dips, crackers, and a selection of appetizers that varied each Thanksgiving. These turkey puffs are my mom's favorite of all those recipes, and this is the first year that I made them in our home. Happy Thanksgiving. 
​
Homemade mayo
Cream puff dough
Whip eggs together until dough is shiny
Turkey, celery, bell pepper, onion, apricot
Poke steam hole immediately.
Turkey puffs!
Turkey Salad Mixture
​Dressing
​

1/2 cup mayonnaise
1/4 cup olive oil
1/4 cup apple cider vinegar 
2 tsp grated ginger
4 cloves garlic, pressed
1 lime, zested
1/4 tsp red pepper flakes

​Whisk together the dressing ingredients in a large bowl.  
Filling
​

1 1/2 lbs left over turkey, diced
2/3 cup dried apricots, diced
1/2 cup celery, diced
1/2 a small onion, diced
1 small red pepper, diced
2 tbls finely chopped pecans, toasted

Add the filling ingredients to the large bowl with dressing and fold together until well-mixed. Taste for salt and pepper and place in refrigerator while you prepare puffs.  Stir pecans into turkey mixture right before you load puffs. 
Cream Puffs

2 1/2 cup water
1 1/2 cup butter
1/2 tsp salt
2 1/2 cup flour
10 eggs 

  1. Heat oven to 400 degrees.
  2. Bring water, butter, and salt to full boil in a large pot.
  3. Whisk flour into boiling water until it forms a ball. 
  4. Remove from heat and let cool for 10 minutes
  5. Stir in eggs, 1 at a time, beating well after each addition. 
  6. Whisk until dough is shiny. 
  7. Shape tablespoons of dough into 1-inch balls on greased cookie sheet, 2 inches apart. 
  8. Bake for 28-33 minutes, until puffed and golden. 
  9. Pierce puffs with knife to let steam escape and centers to dry. 
  10. Cool completely on wire rack.
0 Comments

Beef Ribs for Laura's and Shane's Wedding

9/4/2016

0 Comments

 
A little over a year ago, we saw Laura and Shane walk down the aisle at the Nature Center. Finally, here is our rib recipe. There are a few steps, but the process is very simple. Enjoy!
Picture

1. 

Slather yellow mustard on beef short ribs.

2.

Coat ribs with a rub mixture:
1 part cayenne
2 parts cumin
2 parts black pepper
2 parts onion powder
2 parts garlic powder
4 parts brown sugar
4 parts kosher salt
8 parts smoked paprika

Picture
Picture

3.

Vacuum seal and sous vide at 150 degrees for 12 hours.

4.

Prepare the ribs for the smoker by coating with mustard and rub. Smoke for 2-4 hours. 
Sprinkle rub.
Temperature
Take to smoker.
Le Chef

5.

From the smoker, we vacuum sealed and froze the ribs in preparation for the big day. The last few batches were served right out of the smoker. 

6.

Presentation wise, some ribs were served with the bone in, but most was sliced.  
Laura and Shane whipped up tomato soup, macaroni and cheese, and caesar salad. It was a great day and great food. Cheers!
Thinly slice
Serve
Bone in or sliced
The spread
It took the whole family
The final plate
0 Comments

Ceviche

6/15/2016

0 Comments

 
Picture
Ceviche has a long standing history in the Vogel/Conoan clan. This acid-cooked dish is a tradition at family weddings and has been a refreshing main course for years. 

The traditional halibut ceviche recipe has been morphed into new iterations over time. Adam has a great salmon ceviche recipe that uses orange, lime, lemon, and habaneros. This last weekend, inspired by the fresh seafood at Pike's Market while visiting Laura and Shane, we made something new. 

Recipe
  1. Finely chop 1 lb shrimp into 1/4 inch pieces
  2. ​Finely chop 1 lb scallops into 1/4 inch pieces
  3. 2 tbls plus 2 tsp salt
  4. Cover with half lime and half lemon juice
  5. Taste the juice and add salt until it tastes like the ocean.
  6. Stir fish every hour. After about four hours, check the biggest piece of fish for doneness.
  7. Once cooked, drain the juice and add onions and peppers.
    1. Minced onion: Eyeballing it, add 1/3 of the volume of meat in onions.
    2. Minced habenaro, serrano, and jalapeno: Eyeballing it, add 1/3 of the volume of onions in peppers.
  8. Serve ceviche over diced avocado and tomato. Top with cilantro!

Seattle calls for Ceviche

Picture
Laugh and Drink
1 pound each - Scallops and Shrimp
Citrus and Salt
Cook
Onion, Serrano, Habanero
Prepare
Tomato
Avocado
Cilantro
Caesar Salad
Plate
Shane's creativity at work
Cheers
Selfie Time!
Mix for leftovers
0 Comments

An Omelette

6/15/2016

1 Comment

 
Adam says, "It's just an egg, you know?" 

Yes, I know.
Simple Grandness

​Backyard eggs
Washed in sunlight
Mushrooms, onions, cheese
Homemade sauerkraut
​An Omelette
Grandness
Simplicity
​Everything
Picture
Picture
Mushroom, onion, cheese, omelette with left over ceviche and homemade sauerkraut.
Picture
Picture
1 Comment

Pierogis with the Mrs. Zych and Kasia

11/8/2015

0 Comments

 
This post is about a conversation. For the last decade, Kasia and I have talked about food, recipes, family, and life. Occasionally, the conversation would lead to an invitation of sharing a kitchen and cooking traditional Polish food. This weekend, I was honored and delighted to welcome Mrs. Zych to our home and cook along side my dear friend. We cooked for hours and made pierogis three ways. Dziękuję​, Dziękuję, Dziękuję.
Picture
Picture
Picture
Picture

The filling

Cabbage Filling
Crisp bacon, then add diced onions to the fat and brown. Pour boiling water over sauerkraut, squeeze liquid once cooled. Add bacon, onions, salt, and pepper and cook in pan. 

Potato Filling
Boil potatoes, skin, and smash. Add cotija cheese (traditionally it would be homemade), onion, bacon, salt, and pepper. 

Plum Filling
Cut dried plums and measure 1/4 cup sugar.
Picture
Picture

The dough

Picture
Picture
Picture
Picture


​The dough. What can I say about the dough besides the fact that compared to the technique of my 74-year-old teacher, I felt like I was using my fingers for the first time as I awkwardly fiddled with the flour, eggs, and water. 

The two professionals in the kitchen turned the ingredients into a delicate pastry in mere moments. 
Picture
Picture
Picture
Watching Mrs. Zych make the dough was like watching a skilled craftsperson at their trade. Much to mine and Kasia's worriment,there is one and only one right way of making this dough.
Picture
Picture
Picture
The Master
Picture
Picture
Picture

Make the pierogis

Picture
Picture
Picture

Cook the pierogis

Picture
Picture
Picture
Picture
Picture
Dziękuję Mrs. Zych and my sweet Kasia.


To cook, boil for 10 minutes until the dough cooks through.
​Then, fry lightly in bacon lard or butter. 
Picture
I cannot believe that my freezer is full of these sweet bites. 
0 Comments

Eddie's Panama Pepper Sauce

10/24/2015

0 Comments


Special Delivery!

Fresh from Uncle Eddie's garden, we received two boxes of Panama Peppers. Box one = Batch 1, Box two = Batch 2.
Picture
Picture
Picture
Picture
Picture
Batch 1
Panama peppers
Garlic 
Jalapeño
Salt
Batch 2
Panama peppers         Salt
Garlic                        Onion
Ginger                       Serrano
Habenaro                  Jalapeño 
Picture
Picture
Picture
Picture
Picture
Picture

Three week fermentation

Bottle.
​                   Will keep for six months to a year

Picture
Picture
Picture
Picture
Picture
Picture
We have two batches of chile paste and hot sauce. The chile paste proves to be the most used. It mixes well with homemade mayo, homemade kimchi, salmon dip, and makes a yummy condiment in soup. 

Panama Pepper Mayo Over Grilled King Salmon with Greens and Odd Man Rush Beer.

Picture
Picture
Picture
0 Comments

Vegetable Beef Soup & Bone Broth

6/10/2015

0 Comments


Vegetable Beef Soup

Ingredients

Stock:

4 lbs beef bones
1 red onion chopped
3 stalks celery chopped
3 carrots chopped

Soup:

2 lbs stew meat
Beets
Turnips
Cauliflower
Carrots
Mushrooms
Asparagus
Yellow squash
Zucchini
Cabbage
Pomi chopped tomatoes and juice
Salt and pepper

2.

Pull the pot from the oven and add water to cover the bones and veggies. Bring to a simmer and cook for 3-5 hours. Skim, skim, skim. The foam and impurities that collect on the surface will add a mucky flavor to the broth if not removed. The only tool for this job is a mesh spoon. 

4.

In the now empty dutch oven, add avocado oil over medium high heat and brown the stew meat. To create a beautiful fond and happy maillard, don't over crowd the pan. Go slow and cook in batches. 
Picture

6.

Let the beef simmer for 30 minutes or so. Again, skim, skim, skim. You don't want this (below) clouding the flavor of the soup. 
Instructions

1.

Drizzle the bones, onion, celery, and carrots with avocado oil and salt and pepper, then roast for 45 minutes at 425 degrees. I roast these right in the cast iron pot that I will cook the soup in on the stove top. 
Picture
Picture
The bones in the pyrex are for the 48-hour broth (see below).

3.

After the bone broth has darkened and smells rich, filter the broth through a colander to remove the solids. 
Picture

5.

When the last batch of beef is done browning, add 2 cups of the stock and scrape the bottom of the pan. This will create a ton of steam and get those tasty brown bits to become become part of action. Next, add the rest of the seared meat and all of the filtered stock. 
Picture
Deglazing

7.

About 30 minutes from serving, add the vegetables (whatever kind you like) in waves depending on how long it will take for them to become cooked. 
  • Beets and turnips (30 minutes)
  • Cabbage, Carrots, and Cauliflower (15 minutes)
  • Zucchini & yellow squash, asparagus, mushrooms, and chopped tomatoes (10 minutes) 
Picture
Yellow beets and turnips - 30 minutes
Picture
Carrots and cauliflower - 15 minutes
Picture
Asparagus, zucchini, yellow squash, chopped tomatoes - 10 minutes

8.

After the stew meat has cooked for about an hour and all the veggies are cooked, season with salt and pepper and serve. This kind of cooking is best shared with people you love. Cook for someone who makes your heart sing, there is no truer expression of love than offering a home-cooked meal. 

48-hour Bone Broth

A few months ago, my friend Kristi taught me the myriad benefits of bone broth, and I've made chicken broth pretty consistently ever since. However, I haven't committed to the super long intensive beef stock process until this week. The crock pot has been simmering away from 19 hours now. The house smells amazing. Here is the process. 


1. 

Picture


Salt, pepper, and oil the bones. Roast at 425 degrees for 45 minutes. 


2. 


Place the bones in crock pot, cover with water, a few tablespoons apple cider vinegar, and set to a simmer. Skim, skim, skim for the first few hours. Then let simmer for 48 hours. 
And now we wait with 17 hours to go...
0 Comments

King Salmon Three Ways

6/3/2015

0 Comments


Coconut King Salmon Bites

Truthfully, this could use a bit of sugar. However, the subtlety of the coconut with the rich succulence of fresh King Salmon is, well, just try it.  Roll over the images below to see instructions. 
Picture
Coconut flour
Skin.
Salt.
Chop into 1 inch squares and dredge in the coconut flour. Sprinkle fresh, cracked pepper on top.
We do this outside on the grill to avoid clean up.
Heat nice and hot.
Fry until golden brown and still pink in the middle.

King Salmon Belly

The belly is incredibly rich and fatty. We often turn these into salmon jerky. When in a hurry, though, add salt and brown sugar and grill them up for a candied salmon delight. 

King Salmon Head

The cheeks and collar are succulent and rich. Just like halibut cheeks, these are a real treat. 
Salt.
Grill.
0 Comments

Chipotle Lime Grilled Chicken served with Fresh Guacamole and a Creamy, Chilled Gazpacho.

6/3/2015

0 Comments


Summertime, time, time, Child, the living's easy

Thank you, Janis Joplin for your version of that old song; I've been humming it for weeks. Now that summertime, time, time is here, the first week has been about restoration. I am taking the dusty, stiff, and dried out parts of myself and bringing them back to life. When I work hard--which I love to do--the price of saying yes to work is saying no to writing, afternoon naps, and reading in the sweet sunshine of our deck. It is pure bliss to discover the nuances and secrets that our back yard holds for us. The chickens have their routine, and Wilson and I get moving slowly in the mid morning warmth. What abundance I feel in the early afternoon as I have finished some chores, the house is tidy, the flowers and plants and chickens are cared for, and there I am with nothing before me except the expanse of an afternoon--the truest form of wealth.

PictureChipotle lime grilled chicken served with fresh guacamole and a creamy, chilled gazpacho


This weekend, Adam and I made some new dishes that are perfect for an evening on the back deck.


Chipotle Lime Grilled Chicken

Mix together the following ingredients, add chicken thighs, and vacuum seal to marinade in the fridge for the afternoon. Then, Grill.
1/2 cup cilantro
3 chipotle chiles with 1/4 cup adobo sauce
1/3 cup lime juice
1/8 cup avocado oil
Picture
Picture

Guacamole


Smash together:
1 bunch of cilantro, finally minced
1 onion, minced
1 jalepeno, minced
5 avocados, sliced in the peel, then scooped into bowl
Salt to taste
2 tbls olive oil 

Gazpacho

There is nothing better for the soul on a hot summer day than a bowl of gazpacho (Check out the Cooks Illustrated recipe). We started making this recipe a few years ago, and scorching hot days haven't been the same since. 
Rough chopped veggies for the soup
1/4 inch diced veggies for texture
Top with a drizzle of olive oil and fresh chopped scallions.
0 Comments

CookieCon

11/22/2014

1 Comment

 
This year we created a monster tradition. Every couple chose their top 3 cookies that they can't face the holidays without, and then we all arrived at 9am (more like 10am for us) on Adam's birthday and began the great cookie bake off of 2014. It's the first annual CookieCon.

When Adam and I arrived, a little sleepy from the night before, Erika was pulling the first batch of cookies from the oven. spiced molasses, sugar, and butter scented the air. With Spiced Molasses Cookies from Cook's Illustrated done, there were only twelve recipes to go. 
Matt and Kathy
Sugar Cookies
Spritz
Russian Tea Cakes

Erika and Mike
Spiced Molasses 
Corn Cookies from Milk Bar
Bon Bon Balls
Chewy Chocolate Peanut Butter Chip
Adam and Mindi
7-layer cookies
Rugelach
Ginger Snaps

Jessie and Paul
Fudge (orange and regular)
No Bake Cookies
Peanut Butter Kisses
It feels like Christmas is here before Thanksgiving, but that seems fitting considering Buffalo, NY has more snow on the ground than we do. In contrast, what seems perfectly right is spending a day baking cookies and celebrating Adam's Birthday with our big family. We miss you Laura and Shane. Happy Birthday my love. 
1 Comment

Salmon Salad Sandwiches

8/31/2014

0 Comments

 
This is my go-to alternative recipe to the classic tunafish sandwich. The recipe is adapted from a sandwich recipe book that we got for Christmas from my mom. 
Picture
Picture

Instructions

Ingredients

  • 2 jars of salmon, drained
  • 1/2 cup red onion, diced
  • 2 celery stalks, with leaves, diced
  • 1/2 cup kalamata olives, coarsely chopped
  • 1/2 cup sun dried tomatoes, coarsely chopped
  • 2 tbls capers, drained
  • 3 tbls Italian parsley, chopped
  • 5 tbls basil, chopped
  • 5 tsp red wine vinegar
  • 2 tbls lemon juice
  • 2 tbls olive oil
  • Salt and pepper
  • Fennel, sliced
  • Arugula leaves

Mix salmon, onions, celery, olives, sun-dried tomatoes, capers, parsley, and basil. In a separate, small bowl, whisk together olive oil, lemon juice, vinegar, salt and pepper. Mix together with salmon mixture. 

Serve on a sliced, toasted baguette and top with fennel and arugula. 
0 Comments

Pasta Puttanesca with Canned Salmon

8/31/2014

0 Comments

 
This recipe comes from Kathy's kitchen. We have adapted it from the original Martha Stewart recipe. It makes for a great weeknight, very fast meal.

Ingredients

  • 8 oz whole wheat spaghetti noodles, cooked al dente 
  • 3 tbls olive oil
  • 6 cloves of garlic, minced
  • 1/2 tsp red-pepper flakes
  • 10 anchovies, crushed
  • Two 14.5 oz cans diced tomatoes
  • 3 tbls capers
  • 1/2 cup kalamata olives, chopped
  • 1 jar of salmon, drained

Instructions

Cook pasta in boiling, salted water until it's almost done; drain. We finish cooking it in the pasta sauce. While the pasta is cooking, heat the olive oil in a large skillet and cook the garlic, red-pepper flakes, and anchovies for 1-2 minutes. Add tomatoes, tomato juice, capers, olives, and salmon. Lower heat to simmer and cook, until slightly thickened, about 5 minutes. Stir the pasta into the sauce and finish cooking, 2 minutes. Serve and enjoy. 
0 Comments

Adam's Salmon Dip

8/31/2014

0 Comments

 
This is my favorite salmon dip. It makes great a brewing snack. Sometimes we eat it with a salad for dinner. Like a good dinner party, it's fantastic after the ingredients mingle for a few hours. 

Ingredients

  • Four half-pint jars of salmon
  • Grate a medium onion using a box grater
  • 3-4 dill pickles, grated
  • 1/3 cup mayo
  • 1/3 cup yellow mustard
  • 2 tsp liquid smoke
  • Dried dill
  • Cayenne pepper
  • Black pepper

Instructions

Drain the liquid from 3 of the 4 cans of salmon. 
Drain half of the liquid from the grated onion.
Mix ingredients from salmon to liquid smoke together. Add dill, cayenne, and pepper to taste. 

Take the dip to the 
                       next level, 
                                and make a tuna melt:

Sough dough bread
Broccoli or spiced clover sprouts
Tomato
Cheddar cheese
Salmon dip

Cook this in a skillet as if you were making a grilled cheese sandwich. It's good. 
0 Comments

Canning Salmon

8/31/2014

2 Comments

 
Every summer we clean out our freezer and process the uneaten filets from the past year. My favorite preparation is simply salt and salmon. This lends itself to great fish that is ready for sandwiches, dips, and pastas. 

Here is the UAF publication for a more thorough explanation of the process. 
UAF Publication
File Size: 725 kb
File Type: pdf
Download File

Quick Reference Recipe

1 filet yields about 6.5 half-pint jars
1/2 inch for headspace
1/4 teaspoon kosher salt
90 minutes at 10 pounds of pressure after a 10 minute vent
32 half-pint jars fit in one canner

Step-by-step Process

1. Prepare Fish

Skin salmon and cut into strips that are the nearly as wide as the jar is tall. Leave room for headspace. 


Apparently, you don't have to skin them; however, we have never tried this. Next time, maybe. 

2. Prepare Jars

Sterilization is essential from here on out. Our kitchen literally turns into a fish processing plant. Clear all counters to give yourself more room now and less to clean up later. 


Check the rims and jars for cracks. 
Picture


While we can reuse the jars time and again, we must buy new lids every time. Even though they are from the factory, check the seals to see that they are smooth. Defects in the lids and jars can cause problems during the canning process. It's worth your time. 

Add the lids to a pot of nearly boiling water. This makes the rubber soft, and sterilizes lids and utensils. Be sure to place the lids seal down in the water. This allows you to pick them up more easily.  

3. Pack Jars

Think assembly line when setting up for this part. 

Pack the jars leaving 1/2 inch of head space for half-pint jars. 

If we cut them just right, we can pack the jars full with minimal dicing. Cut filler pieces from a filet and pack them tight. 
Picture
Picture
Add 1/4 tsp of salt to each jar. 
Picture

4. Prepare for Canning

With a wet paper towel soaked from the hot water in the pot, wipe the rim of each jar to ensure a good seal. 

Using a magnetic wand that comes in canning kits, pull the lids out of the water and place on the jars. Screw the ring on just barely tight. 

The ring is meant to hold the lid in place when the jar contents expand during the canning process, but it needs to be loose enough to allow steam and liquid to release or the jar can explode. 
Picture
Picture

5. Canning

Picture
We can outside on our back deck when the weather is good because I don't love the smell of boiled salmon, which hangs around the kitchen for a while after canning. 
Picture
Load the canner with water halfway up the first layer of jars. Stack the jars exactly on top of each other. 
Place the lid on the canner. Tightening it like lug nuts to get the lid evenly and snuggly screwed on. Check to see that the gap between the canner and the lid is equal all the way around. Turn on the flames.

Once a steady stream of steam establishes itself, the canner is venting. Vent the canner for ten full minutes. 

After ten minutes, place a ten pound weight (dependent on elevation) on the vent and adjust the heat so that the weight rattles every 60 seconds. 

Set the timer for 90 minutes. 
Picture
As the jars cool, they seal to the sound of the lid making a popping noise. It is the single most rewarding step (aside from eating the fish) in this process. Wipe down the lids before they dry.
Picture
Erika and her canned fish
Picture

6. Remove from Canner

Let the pressure release naturally, waiting for the pressure dial to read zero before opening the lid carefully. Extract the molten jars and place them on a rack. Sometimes we find that jars cracked/exploded, no big deal. We just save the jars that make it.
Picture
The canned salmon will be good for a long time. Always inspect the jars before eating. Bulging lids, strange smells and colors, or cracked jars make the salmon inedible. When in doubt, throw it out. 

I have three recipes that I love to cook with this canned salmon.

  • Salmon Salad Sandwiches
  • Salmon Dip
  • Pasta Puttanesca
2 Comments
<<Previous
    Picture
    Picture

    Archives

    November 2019
    September 2019
    January 2019
    October 2018
    October 2017
    July 2017
    November 2016
    September 2016
    June 2016
    November 2015
    October 2015
    June 2015
    November 2014
    August 2014
    March 2014
    December 2013
    October 2013
    August 2013
    July 2013
    June 2013
    March 2013
    February 2013

    Categories

    All
    Barbecue
    Cajon/Creole
    Canning
    Charcuterie
    Cocktail
    Dinner
    Fermentation
    Salmon
    Smoking

Proudly powered by Weebly