IngredientsKale Eggs Green onions Avocado Pork Belly Kimchi, juice reserved Cilantro Avocado oil Roasted black sesame seeds Bean sprouts Brown Rice | |
Instructions
|
|
This Korean classic is showing up everywhere in my life recently. We stumbled upon a magic bowl at Matt's in the Market in Seattle and something called a Seoul Bowl is on the menu at Snow City Cafe at the moment. This weekend, Adam made this for us and the result is something I could eat for breakfast, lunch, or dinner: anywhere, anytime. Is it fair to call it Bibimbap? It gets at the essential ingredients with a few twists. Whatever we call it, it is my favorite thing to eat right now.
2 Comments
It is a happy day to get in a motorcycle ride, smell the fresh scents of fall, and make a nourishing meal. Adam and I came up with this on the fly yesterday. This recipe took very little effort, made the house smell amazing, and will provide leftovers for salads and soups.
Instructions
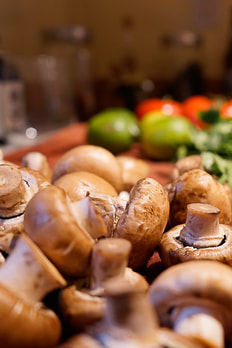
Ingredients 1 pound pork belly 1 pound tough, fatty meat (leg of lamb, brisket, or flank steak) 2 red onions, chopped 4 cloves garlic, crushed 3 jalapeños, halved and then sliced - keep the seeds in if you wish (we do) 1/2 pound mushrooms, sliced 1 tsp cumin 1 tsp coriander 1/2 tsp smoked paprika 1/2 tsp chipotle powder 1 tsp black pepper 3 limes, juiced 28 oz can fire roasted tomatoes and juice - Chop the whole tomatoes if necessary. Adobo sauce from one can of chipotle chiles, 4 or so chipotles, chopped 2 cups chicken broth Liquid Smoke - Use this at the end if desired. Just a few drops will do. Sometimes we omit this if the we're adding things like lamb bacon or something that is already bring a lot of smoke to the party. Instructions
I feel profound gratitude when we get to eat food that has been harvested from our place in the world. It feels like the right way to be, connected to the process of life, death, and life. Last fall, my uncle and cousin took a moose from the wetlands behind our cabins. The fruits of their labor has nourished us, and one of our favorite things to do is to mix it with Alaskan grown fat back. It transforms ever-lean game into some lip-smacking goodness. We've had the good fortune of receiving deer and moose from friends and family. We're immeasurably grateful to those generous hunters.
This season is intoxicating with its urgent colors, especially in Alaska where fall lasts only a few weeks. Because of its brief but brilliant influence, I fully surrender to the mood of it all. Our food becomes heavier to match the landscape, even the colors of fresh cut flowers in my vase echo the season. Mushroom Cream Sauce and Moose over Spaghetti Squash
As so many recipes do, this one came to our kitchen from Adam's mom, which came from her friend, Penelope, which may have come from...? I've been making this recipe for field trips, classes that I teach, and Adam and I for a couple of years. By now, I'm not sure how similar it looks to the recipe origin. What makes this so great is that you too can make it your own. In this recipe we are using our own pork sausage with a seasoning we adapted from Charcuterie.
A little over a year ago, we saw Laura and Shane walk down the aisle at the Nature Center. Finally, here is our rib recipe. There are a few steps, but the process is very simple. Enjoy!
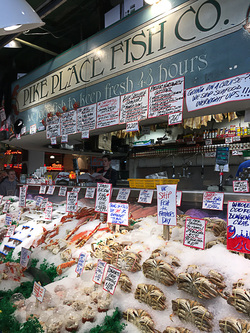
 Ceviche has a long standing history in the Vogel/Conoan clan. This acid-cooked dish is a tradition at family weddings and has been a refreshing main course for years. The traditional halibut ceviche recipe has been morphed into new iterations over time. Adam has a great salmon ceviche recipe that uses orange, lime, lemon, and habaneros. This last weekend, inspired by the fresh seafood at Pike's Market while visiting Laura and Shane, we made something new. Recipe
Seattle calls for CevicheThis post is about a conversation. For the last decade, Kasia and I have talked about food, recipes, family, and life. Occasionally, the conversation would lead to an invitation of sharing a kitchen and cooking traditional Polish food. This weekend, I was honored and delighted to welcome Mrs. Zych to our home and cook along side my dear friend. We cooked for hours and made pierogis three ways. Dziękuję, Dziękuję, Dziękuję. The fillingCabbage Filling Crisp bacon, then add diced onions to the fat and brown. Pour boiling water over sauerkraut, squeeze liquid once cooled. Add bacon, onions, salt, and pepper and cook in pan. Potato Filling Boil potatoes, skin, and smash. Add cotija cheese (traditionally it would be homemade), onion, bacon, salt, and pepper. Plum Filling Cut dried plums and measure 1/4 cup sugar. The dough
The Master Make the pierogisI cannot believe that my freezer is full of these sweet bites.
Bottle. |
||||||||||||||||||||||||||||||||||||||||||||||||||||||||||||||||||||||||||||||||
| Ingredients Stock: 4 lbs beef bones 1 red onion chopped 3 stalks celery chopped 3 carrots chopped Soup: 2 lbs stew meat Beets Turnips Cauliflower Carrots Mushrooms Asparagus Yellow squash Zucchini Cabbage Pomi chopped tomatoes and juice Salt and pepper
| Instructions
|
8. | After the stew meat has cooked for about an hour and all the veggies are cooked, season with salt and pepper and serve. This kind of cooking is best shared with people you love. Cook for someone who makes your heart sing, there is no truer expression of love than offering a home-cooked meal. |
| Place the bones in crock pot, cover with water, a few tablespoons apple cider vinegar, and set to a simmer. Skim, skim, skim for the first few hours. Then let simmer for 48 hours. | |
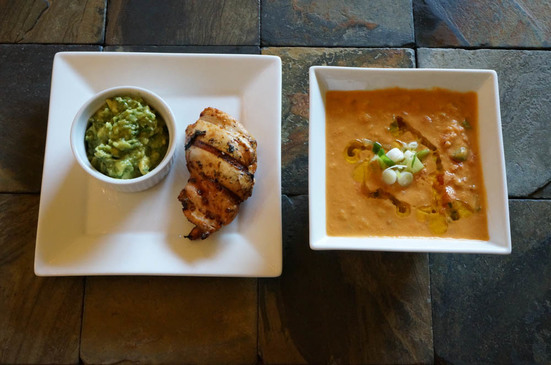
 Chipotle lime grilled chicken served with fresh guacamole and a creamy, chilled gazpacho
 | | Smash together: 1 bunch of cilantro, finally minced 1 onion, minced 1 jalepeno, minced 5 avocados, sliced in the peel, then scooped into bowl Salt to taste 2 tbls olive oil |
| Matt and Kathy Sugar Cookies Spritz Russian Tea Cakes Erika and Mike Spiced Molasses Corn Cookies from Milk Bar Bon Bon Balls Chewy Chocolate Peanut Butter Chip | Adam and Mindi 7-layer cookies Rugelach Ginger Snaps Jessie and Paul Fudge (orange and regular) No Bake Cookies Peanut Butter Kisses |
Instructions | Ingredients
|
| Every summer we clean out our freezer and process the uneaten filets from the past year. My favorite preparation is simply salt and salmon. This lends itself to great fish that is ready for sandwiches, dips, and pastas. Here is the UAF publication for a more thorough explanation of the process. |
| ||||||
| | 1. Prepare FishSkin salmon and cut into strips that are the nearly as wide as the jar is tall. Leave room for headspace. Apparently, you don't have to skin them; however, we have never tried this. Next time, maybe. |
| | While we can reuse the jars time and again, we must buy new lids every time. Even though they are from the factory, check the seals to see that they are smooth. Defects in the lids and jars can cause problems during the canning process. It's worth your time. Add the lids to a pot of nearly boiling water. This makes the rubber soft, and sterilizes lids and utensils. Be sure to place the lids seal down in the water. This allows you to pick them up more easily. |
| With a wet paper towel soaked from the hot water in the pot, wipe the rim of each jar to ensure a good seal. Using a magnetic wand that comes in canning kits, pull the lids out of the water and place on the jars. Screw the ring on just barely tight. The ring is meant to hold the lid in place when the jar contents expand during the canning process, but it needs to be loose enough to allow steam and liquid to release or the jar can explode. 5. Canning | We can outside on our back deck when the weather is good because I don't love the smell of boiled salmon, which hangs around the kitchen for a while after canning. Load the canner with water halfway up the first layer of jars. Stack the jars exactly on top of each other. |
| Place the lid on the canner. Tightening it like lug nuts to get the lid evenly and snuggly screwed on. Check to see that the gap between the canner and the lid is equal all the way around. Turn on the flames. Once a steady stream of steam establishes itself, the canner is venting. Vent the canner for ten full minutes. After ten minutes, place a ten pound weight (dependent on elevation) on the vent and adjust the heat so that the weight rattles every 60 seconds. Set the timer for 90 minutes. As the jars cool, they seal to the sound of the lid making a popping noise. It is the single most rewarding step (aside from eating the fish) in this process. Wipe down the lids before they dry. | 6. Remove from CannerLet the pressure release naturally, waiting for the pressure dial to read zero before opening the lid carefully. Extract the molten jars and place them on a rack. Sometimes we find that jars cracked/exploded, no big deal. We just save the jars that make it. The canned salmon will be good for a long time. Always inspect the jars before eating. Bulging lids, strange smells and colors, or cracked jars make the salmon inedible. When in doubt, throw it out. I have three recipes that I love to cook with this canned salmon.
|
November 2019
September 2019
January 2019
October 2018
October 2017
July 2017
November 2016
September 2016
June 2016
November 2015
October 2015
June 2015
November 2014
August 2014
March 2014
December 2013
October 2013
August 2013
July 2013
June 2013
March 2013
February 2013
All
Barbecue
Cajon/Creole
Canning
Charcuterie
Cocktail
Dinner
Fermentation
Salmon
Smoking